|
|
|
|---|
· Contrary to other drawing primitives, a rendered spline looks completely different than it does during the modelling-process. Let's recall: we had three control- points, each with a radius of one grid-unit. On the other hand we have a thin blue line, which tells us nothing about the thickness of the object. Maybe an image can help ..

· As you can see, the resulting spline is some sort of »curved cylinder« with rounded ends, which has a radius of one grid-unit everywhere along the curve. This leads us to Fact No 3: the control-points of a spline in POVLAB do control the form of the curve itself AND its thickness. Considering this we can extract Fact No 4: altering the position of a control-point changes the form of the curve, whereas altering the size of a control-point changes the thickness of the spline at the respective section of the spline. |
The »Spline-Playground«
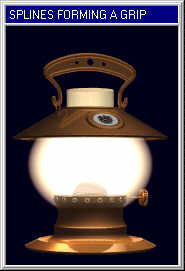
· There is in fact an object in the final temple-scene, where splines are used - the lamp (see picture below).
· If you're new to splines, just have a close look at the position and the size of the control points in the lamp- scene. Alternatively you can make a backup-copy of the scene-file and experiment a little bit with the splines of the lamp. · Certainly we will do some spline-modelling later on, but before that we need to take a look at the functions neccessary for editing a spline, in the case we want to alter such an object somewhen. |
| Chapter B/Page 17 |
|
Mail to webmaster:
support@povlab.org This page was last modified on: 1996-08-09 |
Mail to the author of the POVLAB-Tutorial:
lepschi@source.co.at |