|
|
|
|---|
|
Generating landscapes with heightfields
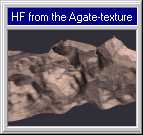
· The most popular thing to do with HFs is to create landscapes, mountains or rocks and that's what we are going to do now. What do we need to get a decent, soft and mountainous landscape? Well - we need an image, with smooth color- transitions and not too bright or too dark parts in it (otherwise we would get a HF with great differences between the single altitude- levels). Some of the »Marble«-, »Agate«- or »Granite«- textures produce excellent HF-images, when rendered with a good »antialiasing«-value. Now, here is the guide, to accomplish our task ...
Step 2: create an omni-light, move it to the position X=0, Y=0, Z=-4 and set the color to 0.70 for the R-, G- and B-channel. Step 3: create a camera and adapt the position and the field-of-view«-settings, so that the camera-view shows nothing else than the box. Step 4: render this scene, rename it and save it as a new scene afterwards. |
· Now take your time and study the pictures above, to see the relation between color and altitude. Additional heightfield options · The HF we have just created looks quite nice. As you could see, a HF is a very flexible object, even though it has got only one parameter more than drawing primitives. This parameter is called »water-level« and can be accessed in POVLABs »manual setup«- dialog by clicking on the »parameters«-button. · The »water level«-parameter specifies the height, at which POVRAY will start to render the heightfield. All parts lying beneath the water-level will not be rendered and stay invisible. Possible values for the water-level range from 0 to 1, where 0 stands for the bottom and 1 for the top of the HF. For example: specifying a water-level of [0.5] will leave the lower half of the heightfield unrendered. |
| Chapter B/Page 3 |
|
Mail to webmaster:
support@povlab.org This page was last modified on: 1996-07-27 |
Mail to the author of the POVLAB-Tutorial:
lepschi@source.co.at |